Here's how I did it:
Take your picture, and crop a portion the same aspect ratio as your canvas (you can change your rectangle select to 'fixed aspect ratio' and, in this case, make it 20 x 16)

Resize the image to the size of your canvas at 100dpi (so, 2000 x 1600, for me)
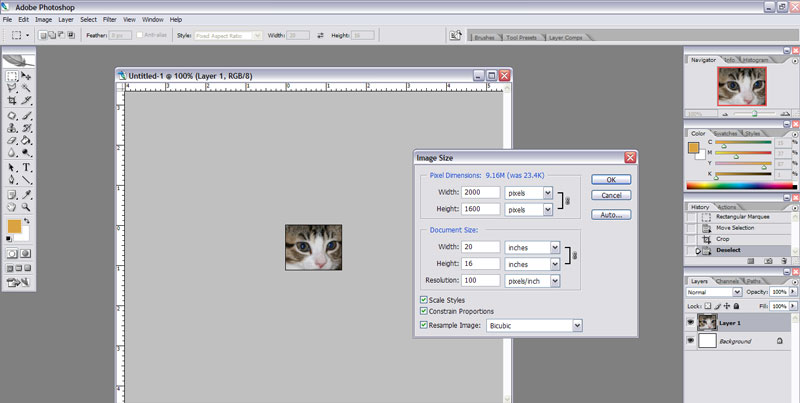
Change the image mode from RGB color to CMYK color. That is in the Image->Mode menu. If you don't do that, the next steps won't work right.
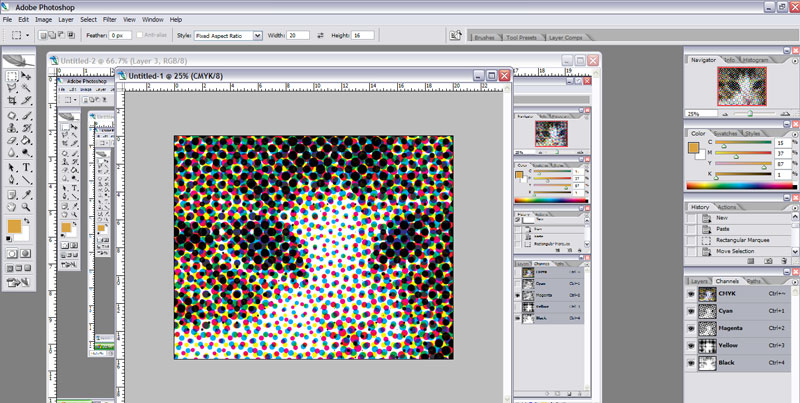
I couldn't get a screenshot of the halftone menu for some reason, but it is under Filter -> Pixelate -> Color Halftone...
You can play with any of these settings you want, but to get the effect I got, try your Max Radius at 50 pixels (half an inch, at 100 pixels per inch).
This should be the result:
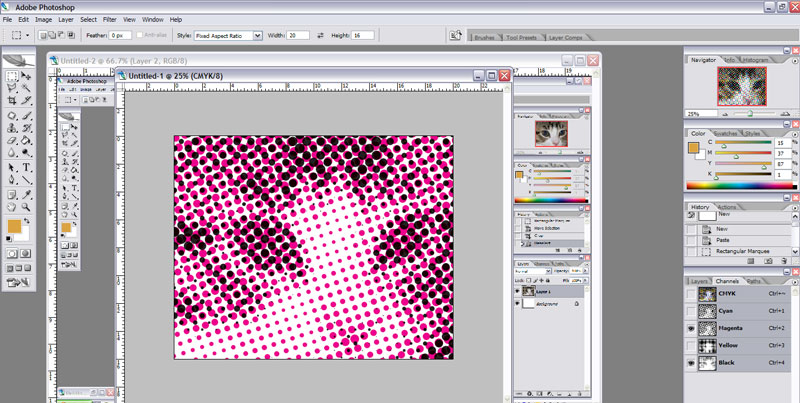
To print your individual colors (and to decide which channels you want to paint) go to the Channels pallet...if it isn't showing, show it with your Windows menu. Hide one or more of the channels. Through trial and error, I determined that trying to do all four channels is too busy...it is nearly impossible to get multiple colors to mix evenly. The best effects I could get were using black and one channel of color, like this:
Once you get something you like, hide all the channels except one, print it on transparency, then hide all the channels except your other one, and print it, too. Figure out a way to line them up, overlay them one at a time pointed at your canvas, and paint on!
No comments:
Post a Comment