Showing posts with label hobby. Show all posts

Sunday, March 15, 2009

Holga Photo simulation

My brother in law was playing with his cheap plastic Holga camera when he came to visit, and I was inspired to see if I could approach the effect digitally.  

The camera original shot on medium format film, which was then often cross-processed, resulting in a unique artistic color pallette.  Cross processing is intentionally or accidently developing film using the wrong chemical baths.  Here's an actual image from an actual Holga, that has been cross-processed:

Note the yellow-orange skin tones and cyan sky that is the signature of a cross-processed image.

For maximum 'realism', I duplicated the camera as much as possible with the tools I had at hand, namely a Canon Rebel xti and a prime lens:

F/13, 50mm (not 60mm, sigh), ISO 400, shutter speed 1/100.  

Then I played with a variety of 'old timey' action sets and filters, most of which were awful and didn't do anything close to what I wanted.  I ended up doing most of the effect 'by hand'.

Here's a source image we took that duplicated all the Holga settings (except focal length):


And here is my attempt at emulating the effect:

I'd say I got 60% there.  I'll fiddle some more and see if I can do better.  The analog process of the plastic camera is fun, as they are about one step above shoebox/pinholes.  Plus, hacking it to use 35mm film instead of medium format is a fun challenge.  They're about $20 on Amazon....hmmm...may have to pic one up.

Thursday, January 29, 2009

Home Network planning

I'm planning out in my head a home network, and have a few things left to determine, so thought I'd make a blog post to help sort things out.

Name: Mouth
Downloader/Web Host/Stream server (WinXP, Cracked-screen Laptop)
Primary Responsibility: Download client
Secondary: Streaming video processor
Tertiary responsibility: Bedroom music broadcaster
Location: Closet
Internet: Wired
Display: Onboard
Special Hardware: Logitech MusicCast USB transmitter,
Special Software: uTorrent, PlayOn, PiMPStreamer

Name: Stomach
File Server/Exercise Room PC (Ubuntu, full sized Viao chassis)
Primary Responsibility: File Server
Secondary Responsibility: Media for exercise room
Location: Exercise room
Internet: wired
Display: 22" Samsung, wall mounted
Special equipment: 750gb hard drive
Input: TBD (wireless keyboard/trackball combo?)
Software: File Server software TBD


Name: Intestine
HTPC (Ubuntu, Silver Micro ATX chassis)
Location: Living Room
Internet: Wired
Display: 50" Samsung in media center
Special Hardware: Barracuda sound card (pending PCIe motherboard), Logitech Harmony remote, wireless keyboard/mouse combo, IR reciever
Special software: XBMC, girder or linux equivalent

Desktop (OSX, iMac)
Internet: Wireless

Laptop (WinXP, HP Laptop)
Internet: Wireless

PSP with wireless internet feeding off of PiMPStreamer for streaming videos and music

Total shopping list to accomplish all of this:
Power Supply for MicroATX case
CAT5e jack for exercise room

Optional: New MicroATX motherboard, downstairs surround sound

Friday, July 18, 2008

New Job and Cool Knives

I accidently got a new job (ask me about it if you haven't heard, it's a funny story). It should be a fun new challenge.  I start the beginning of August.  It is at AmSafe Aviation, an aerospace seatbelt company.  They have a huge production facility here in Phoenix, and are the #1 supplier of aircraft seatbelts worldwide...start checking the back of your buckles when you fly!

Related to this by a distant tangent (stay with me), I've been looking to get a new pocket knife. I miss being without something sharp from my Boy Scout days, but the last time I bought a knife and tried to carry it, it was a cheap 'tactical' knife with huge blade, and I sliced my finger with it pretty badly from being out of practice (it left an interesting scar, I'll try to take a picture of it see below). I think I gave that knife to my dad with blood still on it.
Ouch :(


Anyways, now that I'm not a teenager, I have no desire to carry a giant manly scary looking knife, so I was poking around on one of my forums (edcforums.com) for something more 'gentlemanly' and less likely to cause alarm.  I noticed a knife designer, Chad Los Banos, who designs knives for Boker, responding to people's comments.  This level of interaction was very impressive, and even more intriguing, his knives are available for sub-$30--skirting clost to impulse-buy prices (or easy birthday gift range...ahem ahem wink wink nudge nudge two weeks is plenty of time for ordering things online).

The two knives that interest me the most are the Boker SubClaw and ResCom.  They are both variants of the original Boker SubCom design.


The ResCom (bottom, if you couldn't figure out) is available with a red handle, which I'd love so I could easily distinguish them.  It has a 'blade' optimized for ripping seatbelts and other webbing (which I'll be working with on a daily basis--see, I told you it would tie back in), as well as a serated section for making short work of thicker ropes.  The SubClaw's 2" hawkbill-style blade is great for more conventional knifing duties, and at $26 each for the ResCom, and for the SubClaw at edcdepot.com, I'm going to have a hard time not daily carrying both of them.

Thursday, June 26, 2008

Creating an Ikea Craft room

Well, the new addition to the family is coming soon. Unfortunately, our two bedroom house is full of stuff right now...including our second bedroom, which is eventually (ed: eventually has arrived!) going to be the nursery. At the beginning of this project, it was half full of my wife's sewing and craft stuff, which needed to be moved. (the other half has my hobby stuff, which will be dealt with later) We didn't have any easy places to move it to, however--it is a small house. We had three options:

1. Get rid of the craft stuff (unacceptable)

2. Box up the craft stuff and put it in storage (undesirable)

3. Be creative!

Since we have a carport, we never ever (ever ever ever) use our front door. In fact, our front hall looked like this:


We saw some potential to repurpose this space, so we cleared it out:


We took some measurements and headed to Ikea. First order of business, hide the front door:


We found a cool desk with a pull-out L-extention that exactly fits the space:


A railed storage system will be a good use of space for items that need to be frequently accessed:


There was 8" left over, so we bought an 8" wide shelf that was supposed to be for CD's...I was so happy our measurements were accurate!


Sewing stuff starts to get transfered...


We decide it needs more light, and a power strip. A trip to Wal-Mart for parts (we repurposed the lights from the old craft room)


And, tada! A fully functional craft room in a space once devoted completely to a litter box and some junk.


Hopefully this inspires someone to make the most of the space they have! It was definitely a very satistfying weekend project, and my wife is ecstatic...she says it's the best craft space she's ever had. That's good enough for me to call it a success!

(ed: originally posted 5-8-2008)

Project Nerdcycle--Exercise Bike Hacking

I am getting fat. It's a fact of life brought on by a desk job and a sedentary lifestyle.

This displeases me, so I decided to do something about it.

I bought an exercise bike on craigslist for $100. I rode it five times. It then became my footrest while I surfed the net, as it is next to my computer.

I decided enough was enough, and I had to make it fit into my lifestyle. So, some hacking was in order.

Exercise bike before:


Spare monitor I happened to have lying around with no home, and a mount I picked up at work that seemed suited for this project:


First things first, I had to see how much wiring I was looking at, so I took the control unit off.


Doesn't seem too excessive, I'll just cut the harness in the middle and extend it.

First, though, that bookholding lip has got to go, and I'll need to drill some holes and mount the backplate for the monitor mount.


Looks good!

Now, where to put the control unit. I still need to be able to use it while I'm riding...I think right by my left hand would actually be more convenient then the stock location.

I mock up a mount idea with a paint stirrer and some PVC:


Fits perfect, the ergonomics are vastly improved over stock. My 'mockup' is actually quite sturdy...I was going to make a metal one after work tomorrow, but I may just stick with this one until it breaks, if it ever does.

On to the more difficult part....extending the harness. I have some bulk CAT-5 laying around that I decide to use as raw materials, and 30 butt connectors later...


....I've got a 4' harness instead of a 18" one. Wasn't so much difficult as tedious.


Moment of truth...


Yay, everything works!

This is as far as I got today:


Still to be done:

*loom the wires and ziptie them so I can't trip and die

*Figure out what source I'm going to use for this (most likely: rig up a laptop shelf/slot)

*Make an adapter plate to raise the monitor 3" (my knees hit if I'm peddling vigerously)

*Come up with a workable keyboard solution

*Make a matching mount by my right hand for a mousepad

All in all, not a bad days work! Once it's done, I'm going to do all my at-home internet surfing on it. I may put a switch on it so the monitor only stays powered up if the RPM is above a minimum level, we'll see!

(ed: Originally posted 2-13-2008.  Submitted to Lifehacker for their reader contest, and won a book with it!   Also, every google search result for as many pages as I looked through for the term 'nerdcycle' refers to my project!)

Acrylic Halftone Painting Tutorial

I'm sure there are several ways of getting the effect I showcased in Acrylic Halftone Paintings.


Here's how I did it:


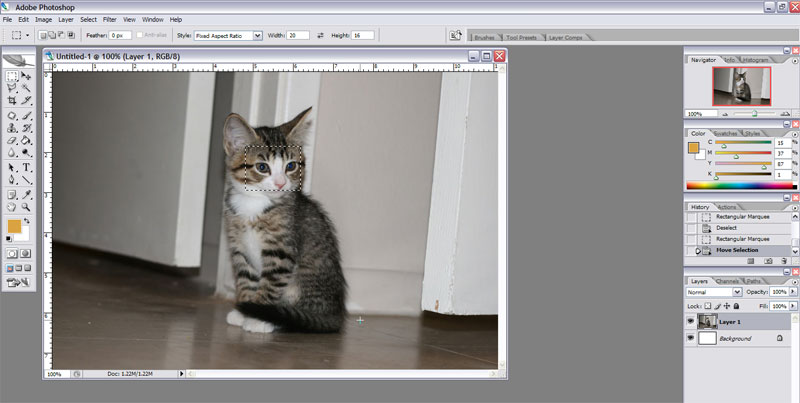
Take your picture, and crop a portion the same aspect ratio as your canvas (you can change your rectangle select to 'fixed aspect ratio' and, in this case, make it 20 x 16)


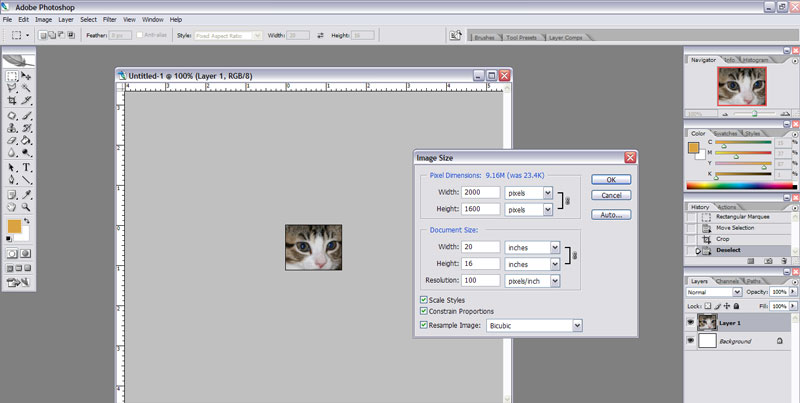
Resize the image to the size of your canvas at 100dpi (so, 2000 x 1600, for me)


Change the image mode from RGB color to CMYK color. That is in the Image->Mode menu. If you don't do that, the next steps won't work right.


I couldn't get a screenshot of the halftone menu for some reason, but it is under Filter -> Pixelate -> Color Halftone...


You can play with any of these settings you want, but to get the effect I got, try your Max Radius at 50 pixels (half an inch, at 100 pixels per inch).


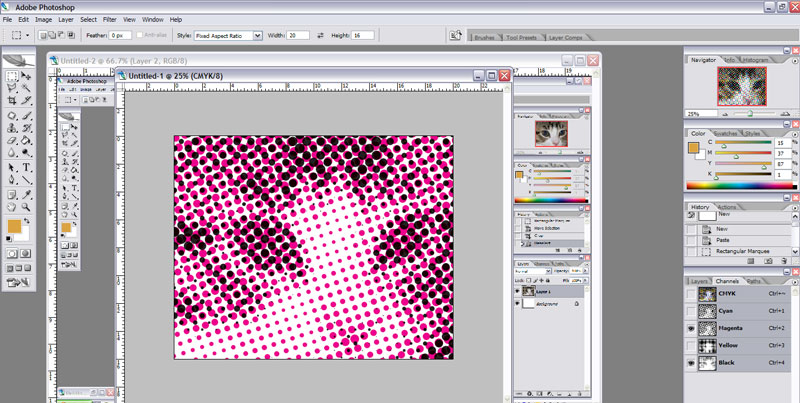
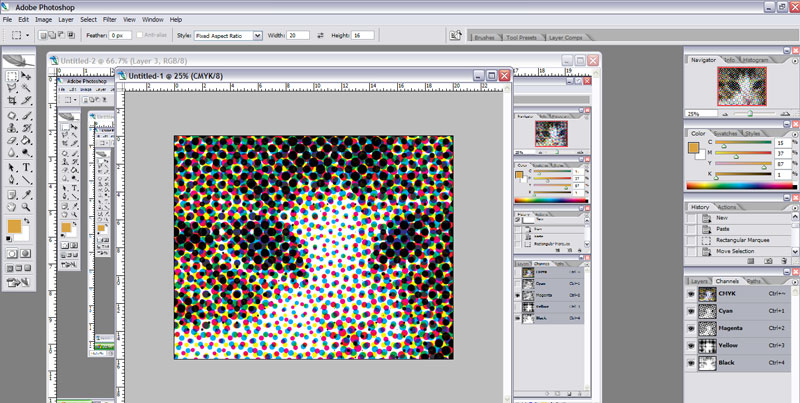
This should be the result:


To print your individual colors (and to decide which channels you want to paint) go to the Channels pallet...if it isn't showing, show it with your Windows menu. Hide one or more of the channels. Through trial and error, I determined that trying to do all four channels is too busy...it is nearly impossible to get multiple colors to mix evenly. The best effects I could get were using black and one channel of color, like this:


Once you get something you like, hide all the channels except one, print it on transparency, then hide all the channels except your other one, and print it, too. Figure out a way to line them up, overlay them one at a time pointed at your canvas, and paint on!

Acrylic Halftone Paintings

I took home an old overhead projector from work, and decided to see if I could do something artistic with it. This was the first project that popped into my head, and I'm tickled to death with the results.


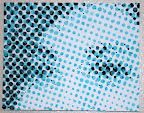
I bought some canvases at Wal Mart ($5 for three 16 x 20...what a deal!) and some round sponge brushes, and 99 cent bottles of cyan and black.

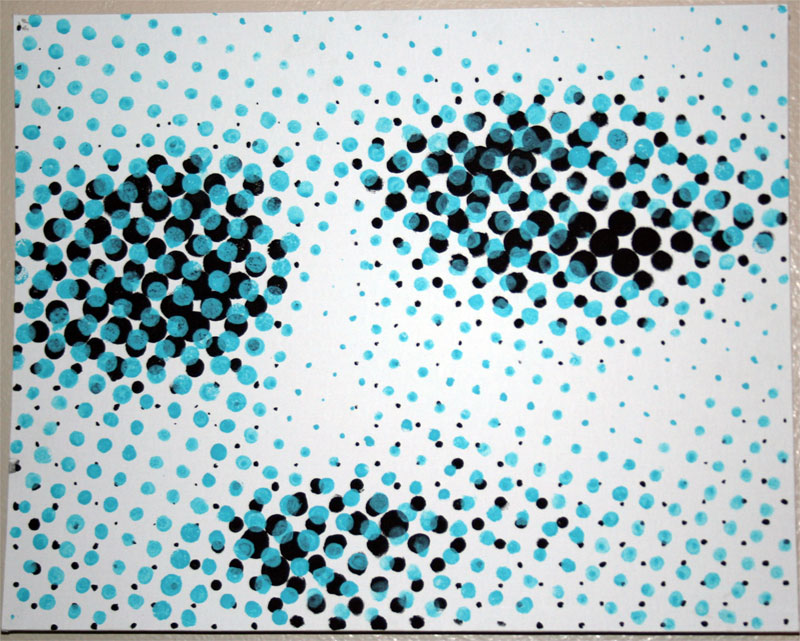
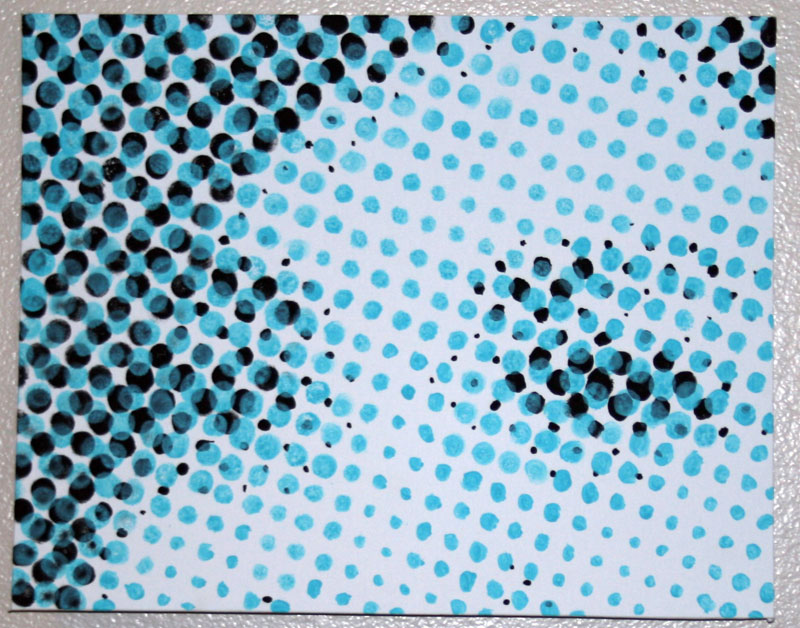
I took two pictures (one of me, one of my fiance) and cropped them down in photoshop to just the eyes, set the mode to CMYK, and had it halftone the pictures with .75" as the maximum dot size. I printed the black and cyan channels on transparencies (along with some alignment marks) and set up my projector and easel.

First I laid down the black, let it dry, and then laid down the blue, watered down enough to let the black show through.

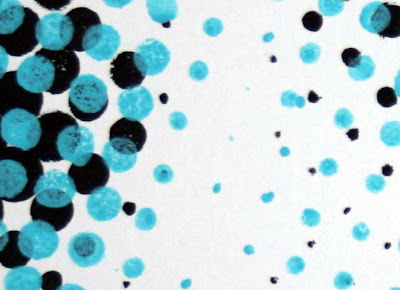
Here's two zoomed in squares, one from each painting, to get an idea of what they look like up close...these are roughly lifesize on my screen, the big dots are about three quarters of an inch:


And here's larger images of the finished product.


The beauty of these is you have to view them from far away for them to 'turn into' anything...try getting as far away from your monitor as you can. If you can't because your against a wall (or are lazy, hehe) here's some thumbnails to simulate the effect:


This was my first venture into non-digital art in probably ten years, and I absolutely love it! I will make another post that gives an expanded tutorial.  Check back soon!
(ed: Originally posted 4/28/07)