Tuesday, November 18, 2008

Ceiling fan mod--buying light kits is for suckers

I bought a really cool ceiling fan that looks awesome and goes great with the look of the house.  However, it doesn't have a light, and I need one.  All the light kits available at Home Depot hung down way too low, so I decided to make one myself out of the stock light and some bits.  I didn't document this as fully as I usually like to, but I did take a bunch of pictures at beginning, middle, and end, so, onward!

Here's the stock light.  These lights are installed all over the house, so it was important to me to match it with the finished product.

1stock1.jpg

Our house is Spanish/Mission/Craftsman style, so this wrought-iron looking fan goes perfect with it.  It took me a solid evening to install, having to reinstall the whole thing (including the support box) three times to get it all installed to my liking (I'm still not totally happy with how the wiring is)

1stock2.jpg

This fan didn't come with a light, but the bottom 'cone' is removeable--or rather, I had to install it.  It had a bunch of electronics in it that I decided to relocate slightly, but more on that later.

1stock3.jpg

Here's the lamp on the ground.  I am going to use the shade...the guts are no good, they're made of cheap sheet metal that I won't be able to use.  It only has two bulbs anyways, and I want my light to have three.

2parts1.jpg

Here's a mockup of what I'm going for:

2parts2.jpg

All of these electronics were in the cone (told ya I'd come back to it), and I relocated them to attach to the bottom of the base.  No major problems with getting everything to fit, I'm not sure why it wasn't like that to begin with.  Note the white and blue wires with the quick disconnects--those are what we will be using for the light (it's what they're for...see, the blue one says 'for light...who am I to argue?)

2parts3.jpg

Due to a great stroke of luck (because I hate drilling glass), the little cap on the end of the cone threads onto a bolt that fits perfectly through the whole already in the glass glass.  This will make my job waaaaay easier.  Also, I think this looks pretty snazzy...this just might work!

2parts4.jpg

A quick run to Home Depot later produces three sockets, a six pack of bulbs (I'm a sucker for the 'reveal' lights), and a nice long 10mm x 1.0 bolt (the thread pitch that the cap fits on).  Oh, and a bunch of tiny screws to mount the sockets...their little tabs had a TINY hole.

3hardware1.jpg

Here's the plan to mount the shade.  I was going to drill out the threaded end that the cap fit on, but it actually unscrewed (even easier!), so the bolt goes into the cone, a retaining nut goes on to hold it securely, and I'll sandwich the shade between neoprene washers on the end.  Easy peazy.

3hardware2.jpg

Here is where I stopped taking pictures and just WORKED...it took me about 3 days off and on to finish it all.  Three light bulbs was a tight fit in the shade, so I had to dremel clearance holes for the bulbs (ugh, dremeling FOREVER), I had to drill tiny mounting holes for the sockets to mount, and I drilled a nice big hole for the cables to pass through.  I also threw in some reflective heat protectant sheet that was in the light...don't want to fry whatever was in those electronics boxes!

3hardware3.jpg

Here's what it looks like with all three bulbs on.  I picked this bulb arrangement because you can actually change the bulbs (something I almost didn't think of, haha)...I tested each socket before I tightened them down.

3hardware4.jpg

Yay finished product!  This is unlit.  You can just barely see the purple of the bulbs...I may have to change to regular white bulbs (or clear) to get away from this if it starts to bug me.

4finished1.jpg

Here it is lit.  I'm very pleased with how it turned out.  Total cost, around $10ish dollars in parts, and I had to buy a new pack of cutoff wheels for the dremel, but I didn't use them up so I'm not counting them.  I like it better than any of the $30+ light solutions I saw for sale, and they all hung down way further (important, as this light is already pretty low)

4finished2.jpg

I call this project...success!
4finished3.jpg

Friday, November 14, 2008

Fish Blimp...the most beautiful thing I've found online in a while

Found this on vimeo, had to share...such a simple Idea, I'm jealous I didn't think of it first!


Air Art from flip on Vimeo.

Tuesday, October 7, 2008

Semi-DIY, Wall-Mounted, Recharging Station/Laptop Desk/Every-Day-Carry Organizer

So, I had a need. It is a common one. I had many (so many!) digital gadgets that needed to regularly suckle at the electric teat. This resulted in an octopus mess of chargers, digital devices crammed everywhere there was an outlet, and a constant search to find plug A suitable for fitting into slot B.


I also had some uncommon raw materials that were dug out of the trash (full disclosure: at my previous place of employment.) Specifically, some pieces of a Wall Furniture Unit. It is meant to be used thusly:


but I had some miscellaneous pieces (and a stick of cable management) on my hands and decided to repurpose them into..


"Semi-DIY, Wall-Mounted, Recharging Station/Laptop Desk/Every-Day-Carry Organizer" (SDIYWMRS/LD/EDCO? Catchy!)


Features:

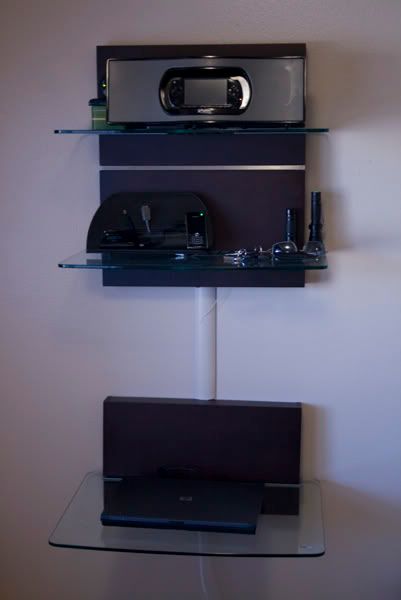
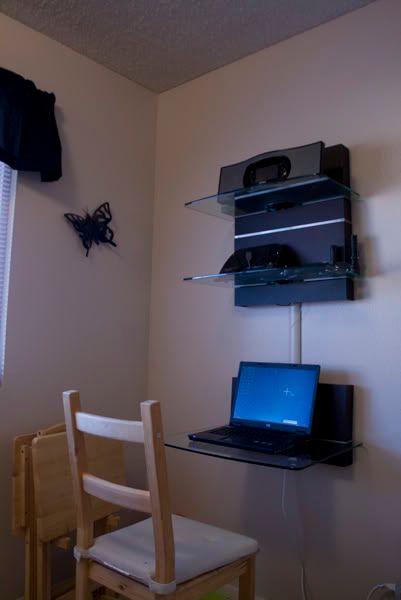
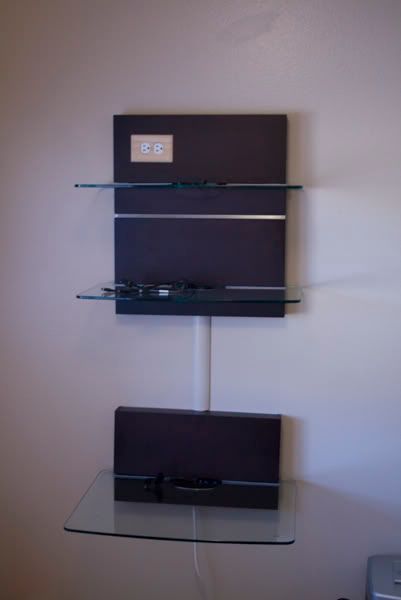
Bottom laptop shelf is desk height (29" or so, I don't remember) for emergency desk use. It's in the breakfast nook, so it's not hard to just flip a chair around and type.


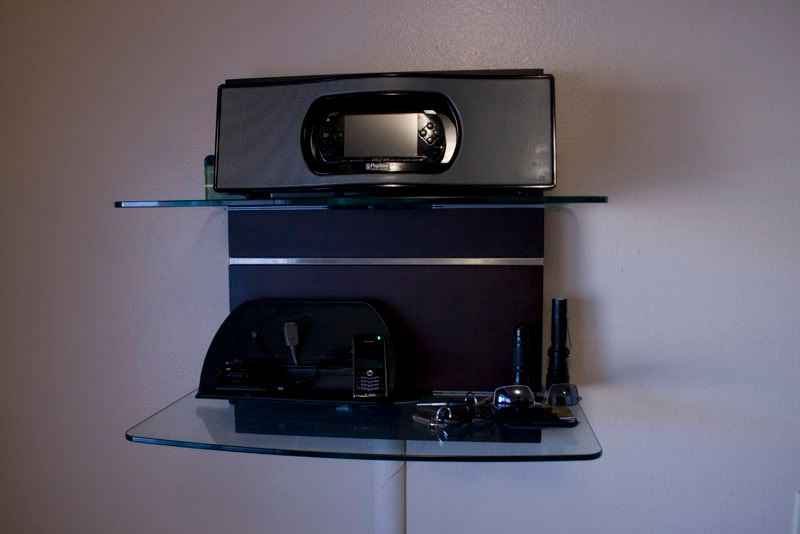
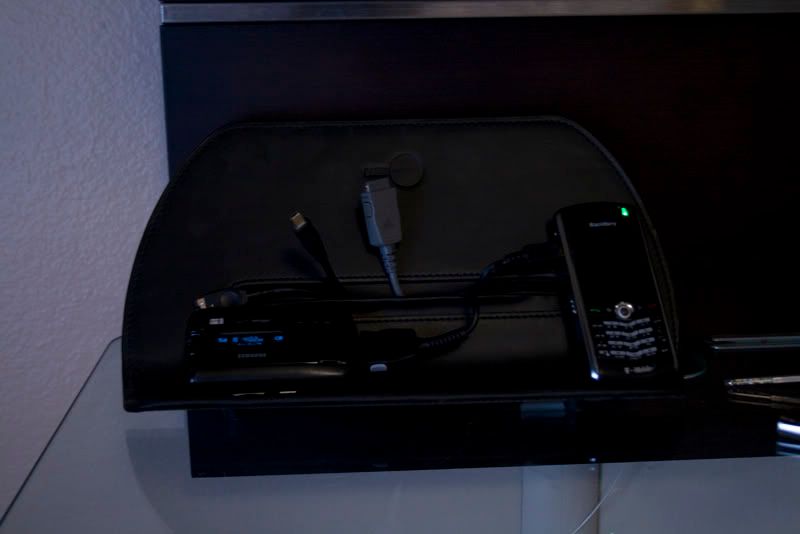
Middle shelf holds everything I carry on me every day (keys, wallet, flashlight, sunglasses, work badge, etc), as well as my cell phone, all in one place. This is right by my carport door, so I just load and unload on my way in and out of the house.


Middle shelf also organizes all of my chargers for various phones, gameboys, portable DVD players, MP3 players, cameras, etc. The little phone stand/organizer thingy was picked up at a tradeshow.


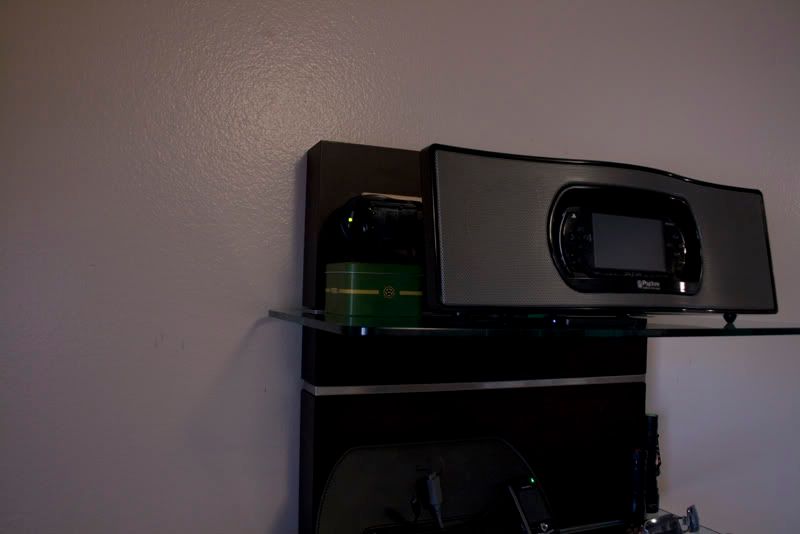
The top shelf has both a media dock (with IR remote!)-slash-charger for the PSP and an exposed outlet for outlet battery chargers (shown: universal Canon charger with fittings for my three Canon cameras in the little green box. Not shown: the charger for my cordless drill batteries)


Now, this (and other recharging stations) isn't so much a DIY project (strictly speaking) as it is an idea...mine just happened to have (pats self on back) a particularly slick implimentation. I suggest that everyone figure out SOME solution that works with their house and life, and do it! Don't just tolerate having cord mess when there are so many better ways to make your life simpler and neater.


Now, with that "The More You know!" out of the way, here are the guts of my particular charging project, hopefully to inspire you to create one of your own:


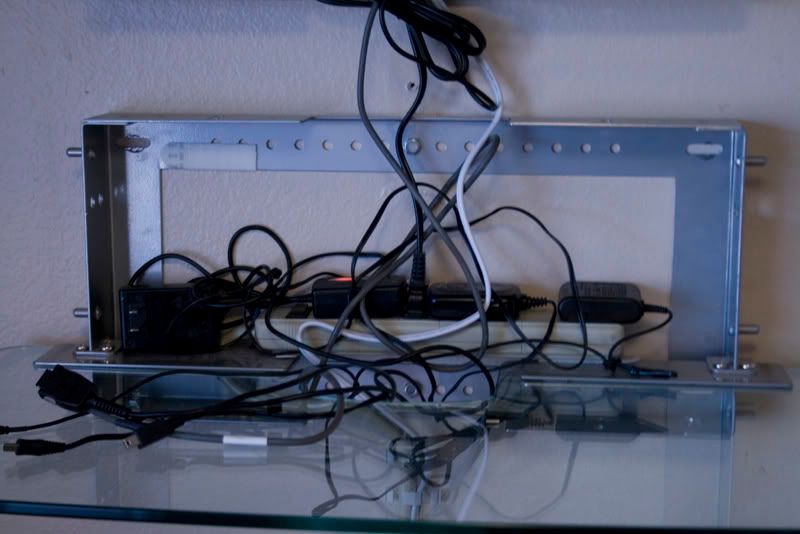
Here it is 'naked':


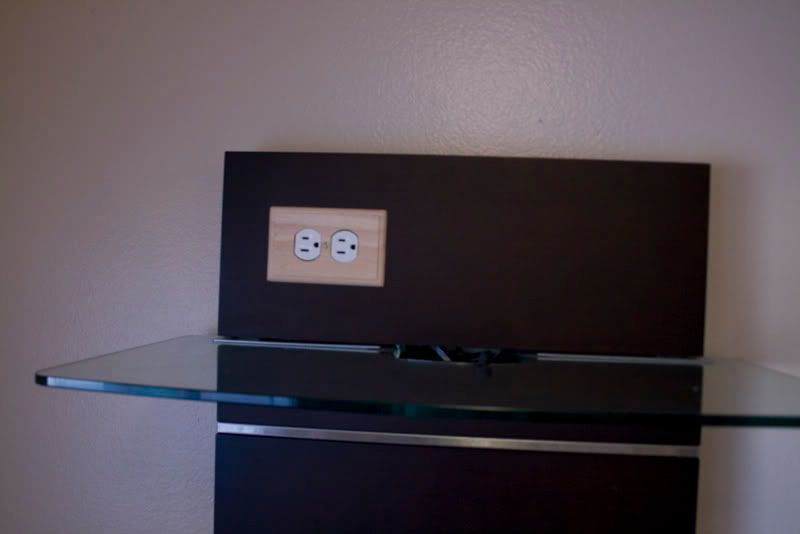
And a closeup on the custom outlet (that I never got around to stain matching) at the top:


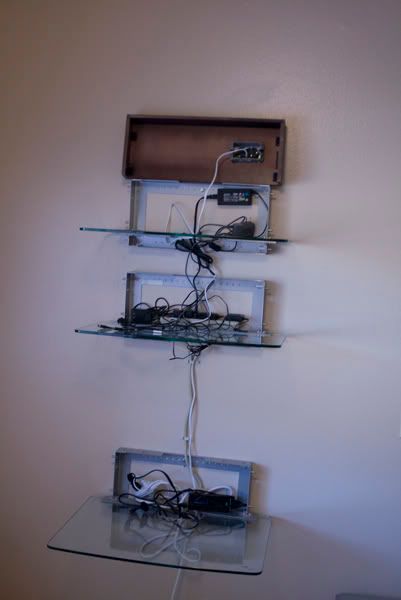
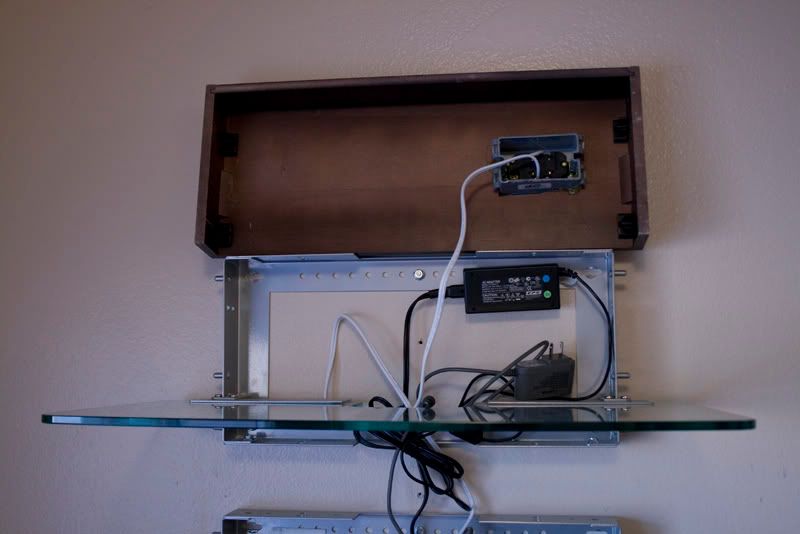
Now, if that is naked, here it is skinned:


Its guts are a power strip, an extension cord with a grounded triplex end, and an outlet mounted power filtration-slash-surge protector-slash-overload protector (not shown) to make sure I don't light my house on fire. Oh, and some of that 3M double sided sticky stuff.


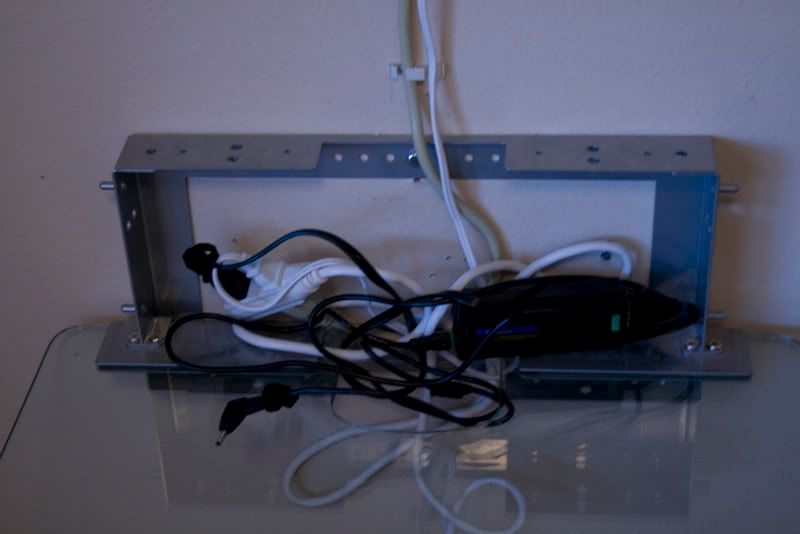
Behind the bottom cable management, I have the head for the triplex outlet. Into this I plug the power strip (which goes up to the next panel), the laptop charger (not shown properly installed--normally the brick gets 3m'ed to the wall and the unused cord ziptied), and the cord for the outlet on the third panel (because all my outlets in the power strip were taken)


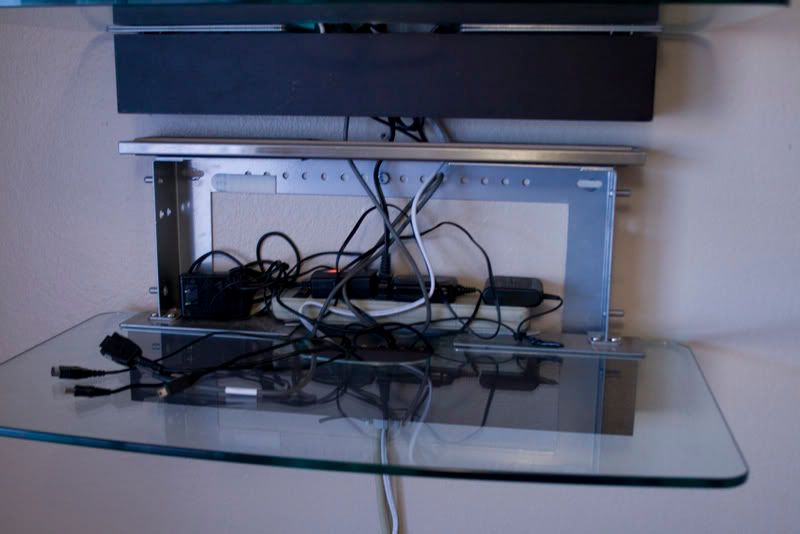
Behind the second panel, I have the power strip (stuck to the shelf) with all my chargers plugged in. I thought about getting some outlet extenders for maximum utilization, but I ended up just unplugging and alternating my less used chargers (you can see one not being used)...this panel is really easy to get on and off.


The third panel has the outlet mounted in it. I jigsawed a hole out of the cover, cut the back off a j-box, cut the head off an extension cord, and hardwired a plug onto an outlet (danger!!! do this at your own risk!!!...not suggested for houses with small children!!!). I flushed up the faceplate with the front of the panel, and then hotglued it from the back to hold everything in place.


You can also see the brick for my PSP charger stuck to the wall and the cord ziptied (this is how the laptop usually is), and a random charger I dont even remember the purpose of that somehow got built in.


Functionally, this works great for me. Having all my chargers organized and in one place super simplifies my life, not to mention the convenience of having all my pocket stuff there, too. As you can see on the panel 3, there are clips that hold the covers on, so it's not hard to change things around, but, to make it even easier to change the main chargers in panel two, I didn't even put the clips on, and just have it be a perfect fit and let friction hold the panel, so I can take it off like so, and change my chargers:


Before I settled on this, I kicked around ideas using roller breadboxes with false bottoms, a drawer, an end table, an upside-down box with all my chargers in side and holes for the cords to come out. I know there are a couple commercial solutions that are similar, but I had never found anything with all of the exact functionality mine has, and definitely not with the same aesthetic.

Friday, September 26, 2008

Ridiculous facial hair

So I was fooling around last night and partially shaved off my goatee, intending to take a picture and finish the job (or trim it down to a sweet 'stache, at least). I got busy, fell asleep, and forgot about it until just now when I went to the bathroom and saw myself in the mirror and started laughing. Took this pic last night....enjoy hehe.
Sent via BlackBerry from T-Mobile

Thursday, September 25, 2008

Woo hoo! Yay new house!

This just popped into my inbox!

Hi Martin and Deborah,

I wanted to let you both know that we received the final clearance from the investor/underwriter. Everything is ready for your closing date. The title company will be contacting you to schedule a time to sign closing documents. Please let me know if you have any questions or concerns. I just want to thank you also for getting me everything I needed so quickly! I really appreciate all of your help. It has been a pleasure working with you. Congratulations on your new home!


Sincerely,

Janis ******


Yay new house!  So exciting!  We actually turned power and gas on Tuesday so that they can finish the installation of the AC tomorrow, and put all the kitchen appliances in.  We have a walkthroug/orientation on Monday afternoon, I'm guessing we have to meet with the title company to sign some stuff, and then we get the keys!  Huzzah!

*does a little happy dance*